groups & operators
Table of Contents
A mask is a tree of groups. Each group combines its members – elements and other groups – with a single operator. This page explains the operators, and how to arrange groups to get the mask you want.
#the one rule
A group is a stack of members whose interaction is governed by the group’s operator. A group starts from its bottom member and applies its operator to each member above it in turn, in the same way as modules are applied in the pixelpipe. A member can be an element or another group: once a group has been computed, its result is used by the group above as if it were a single element, in the same way as brackets work in arithmetic.
The cheat sheet at the end of this page summarizes the operators.
Everything else is a matter of choosing the operator of each group and putting the members in the right order.
#operators
The following images show what a group with two circles produces. The blue outline is the bottom member, the pink outline is the member above it, and the resulting mask is shown in yellow.
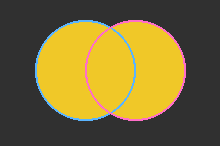
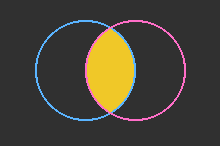
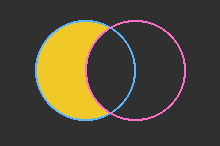
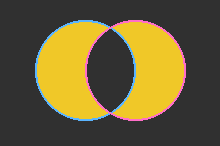
From left to right: maximum (union), minimum (intersection), difference, exclusion.
- maximum (union)
- Everything that any member covers. Where members overlap, the stronger one wins. The order of the members does not matter.
- minimum (intersection)
- Only the area that every member covers. Where members overlap, the weaker one wins. The order of the members does not matter.
- difference
- The bottom member, minus every member above it. Use it to cut something out of a selection. The order matters: see order matters in a difference.
- exclusion
- The areas covered by an odd number of members. With two members, this is “either, but not both”: where the two overlap they cancel out. A third member brings the area where all three overlap back.
#soft edges: union and intersection variants
Masks are not just “in” or “out”: feathered edges, parametric transitions and reduced opacities make them partial. Unions and intersections therefore come in several variants, which behave the same on fully opaque areas and differ only in how partial areas combine.
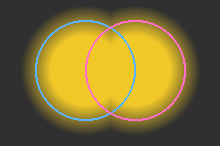
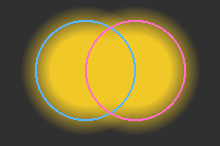
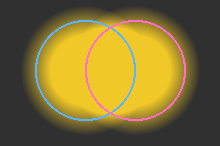
From left to right: maximum (union), screen (smooth union), sum (additive union), with feathered circles.
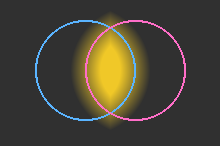
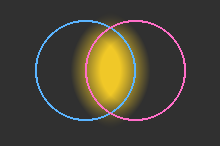
From left to right: minimum (intersection), product (smooth intersection), with feathered circles.
- screen (smooth union)
- Like maximum (union), but overlapping feathered edges merge smoothly, without a visible seam. Mathematically: a + b - a×b.
- sum (additive union)
- Like maximum (union), but opacities add up where members overlap, up to 100%. Two members at 50% opacity give full opacity where they overlap. This is useful for building up an effect with several low-opacity brush strokes (e.g. for dodging and burning).
- product (smooth intersection)
- Like minimum (intersection), but feathered edges fade together smoothly: the mask is strong only where every member is strong. Mathematically: a×b. This is how parametric channels have always been combined in darktable.
When in doubt, use maximum (union) to add and minimum (intersection) to restrict.
#order matters in a difference
A difference keeps the bottom member and cuts away everything above it. Swap the members and you cut the other way:
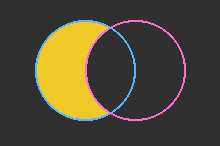
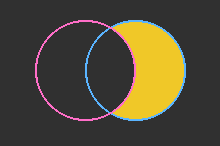
So, to subtract A from B, make a difference group with B at the bottom and A above it. Read it upwards, as a sentence: “B, minus A”. If the result is the opposite of what you wanted, drag the members to swap them.
#reading a mask
Read each group as:
the [operator] of [bottom member], …, [top member]
or, for a difference:
[bottom member] minus [every member above it]
Read the whole mask from the outside in (start from the whole mask, then read each group it holds) and, within each group, from the bottom up.
#an example
Suppose you want to darken the sky of this photo with the exposure module, but a tree sticks up into the sky, and the tree should keep its exposure.
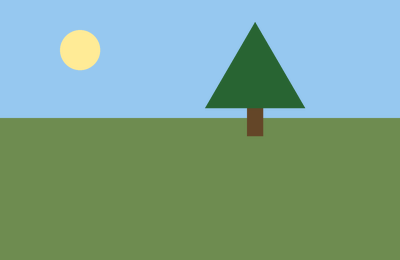
You want to mask the sky, and then remove the tree from it. Assume that you already have one element (or group) that covers the sky and one that covers the tree – these could be drawn shapes, parametric elements, raster masks or AI objects; it does not matter. If you put both into the whole mask, with its default union operator, you get:
whole mask: maximum (union)
├ tree
└ sky
This reads “the union of sky and tree”, which includes the tree instead of excluding it:
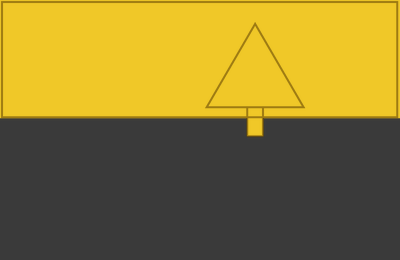
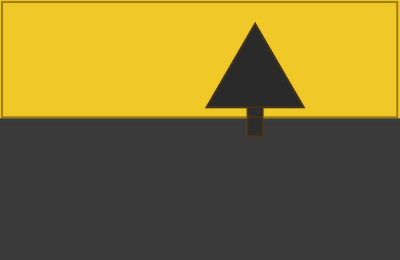
What you want is to subtract the tree from the sky, so change the operator of the whole mask to difference:
whole mask: difference
├ tree
└ sky
This reads “sky minus tree”, which is exactly what you wanted:
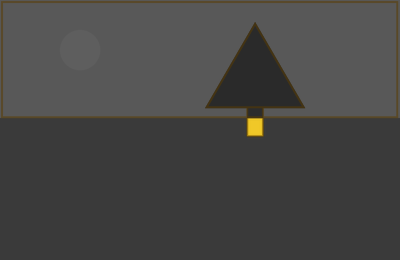
If you swap the two members, you get “tree minus sky” – just the bit of trunk below the horizon:
#adding the lake
Now suppose that the photo also has a lake, which should be darkened too:
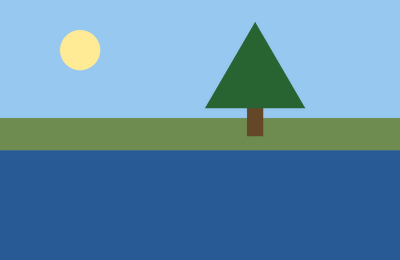
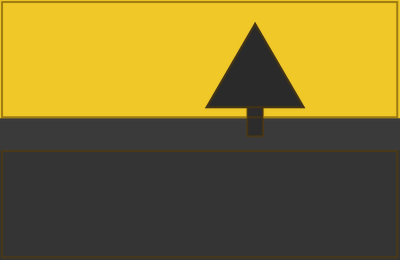
Adding the lake to the whole mask does not work:
whole mask: difference
├ tree
├ lake
└ sky
A difference removes everything above its bottom member, so this reads “sky minus lake and tree” – the lake is subtracted rather than added:
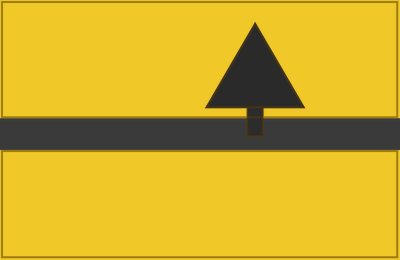
What you want is to subtract the tree from the union of the sky and the lake. The union has to be computed first, so it needs a group of its own:
whole mask: difference
├ tree
└ to dim: maximum (union)
  ├ lake
  └ sky
This reads “what you want to dim, minus the tree”, where what you want to dim is “the union of sky and lake”:
There is often more than one way to build the same mask. Here, the tree does not overlap the lake, so you could also subtract the tree from the sky first, and then add the lake:
whole mask: maximum (union)
├ lake
└ sky without tree: difference
  ├ tree
  └ sky
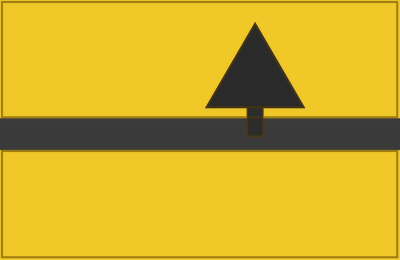
Pick whichever matches how you think about the photo – but note that the two layouts only give the same result because the tree and the lake do not overlap. If a branch hung over the water, only the first layout would keep it out of the mask.
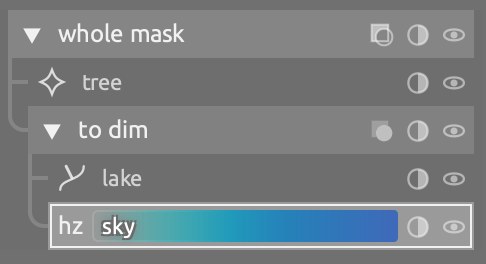
This is the same mask in the mask panel, with real elements: the sky is a parametric element (a range of hues), the tree an AI object and the lake a path. The sky is selected, which is why its row is framed.
#building it in the panel
Work from the outside in, starting from a sentence that describes what you want:
- Find the last step. In “sky and lake, but not tree”, the last step is “but not”: a cut. So the whole mask is a difference.
- Find what is cut. In a difference, this is the bottom member: “sky and lake”. As this is more than one thing, it needs a group of its own – a maximum (union).
- Find what cuts: everything above the bottom member. Here, the tree.
- Repeat inside each new group, until every member is a single element.
Then, in the mask panel:
- Click the operator of the whole mask and choose difference.
- Click
 add group and choose maximum (union). Alt+click its name to rename it “to dim”.
- With “to dim” selected, draw the sky and the lake: new elements go into the selected group.
- Click the name of “to dim” again to select the whole mask, then draw the tree: new elements now go into the whole mask.
- If a member ends up in the wrong place, drag it. “to dim” must be the bottom member of the whole mask.
#the power of composition
Once you have understood this, more complex masks require nothing new. Each element of the example could itself be made of several pieces. For example, the tree could be the union of two parametric elements on the hz channel (one selecting the green leaves, the other the brown trunk), minus a few brush strokes to clean up the selection. The tree then becomes a difference group, with the union of the parametric elements at the bottom (as that is what you subtract from) and the brush strokes above:
whole mask: difference
├ tree: difference
│ ├ clean up: maximum (union)
│ │ ├ brush stroke 2
│ │ └ brush stroke 1
│ └ leaves and trunk: maximum (union)
│   ├ hz "leaves"
│   └ hz "trunk"
└ to dim: maximum (union)
  ├ lake
  └ sky
The mask gets bigger, but the principle is always the same.
#inverting
- invert an element
- The element selects what it used to leave out: “everything except this circle”.
- invert a group
- The group’s result is inverted after its operator has combined the members.
These are not the same thing when a group has several members. In a union group of two circles, inverting each circle selects everything except the area where the circles overlap, while inverting the group selects everything except both circles. Shift+click the invert button of a group to flip the inversion of each of its members instead of inverting the group itself.
#opacity
The opacity of a member scales it before it is combined with the others. In a difference group, a member at 50% opacity only cuts halfway through. The opacity of a group scales its result, on top of its members’ own opacities.
#restructuring
The restructure (
 ) menu in the selection caption changes the structure of the mask around the selected member:
- wrap in group
- Put the selected member in a new group of the chosen operator, where it is, so that you can combine it with what you add to the new group later.
- compose
- Use the selected member as a building block for a larger mask. It is placed at the bottom of a new group of the chosen operator, with an empty group above it to draw into. For example, to cut something out of a finished selection, compose it with difference and draw the area to remove in the empty group.
- simplify
- Remove the groups inside the selected group that change nothing (for example, a group holding a single member). Groups that you have named are kept.
Operators that would change nothing are not offered. You can also select several members and use group together… (see multiple selection).
#cheat sheet
| I want… | build |
|---|---|
| A and B together | maximum (union), any order |
| only where A and B overlap | minimum (intersection), any order |
| B without A | difference, with B at the bottom and A above |
| A or B, but not where they overlap | exclusion |
| everything except A | A, inverted |
| A and B, without C | difference: a union group of A and B at the bottom, C above |
| soft brush strokes that merge without seams | screen (smooth union) |
| brush strokes that build up the effect where they overlap | sum (additive union) |
| a range of colors, only inside a drawn area | product or minimum: the parametric elements and the drawn shapes in one group |