screen layout
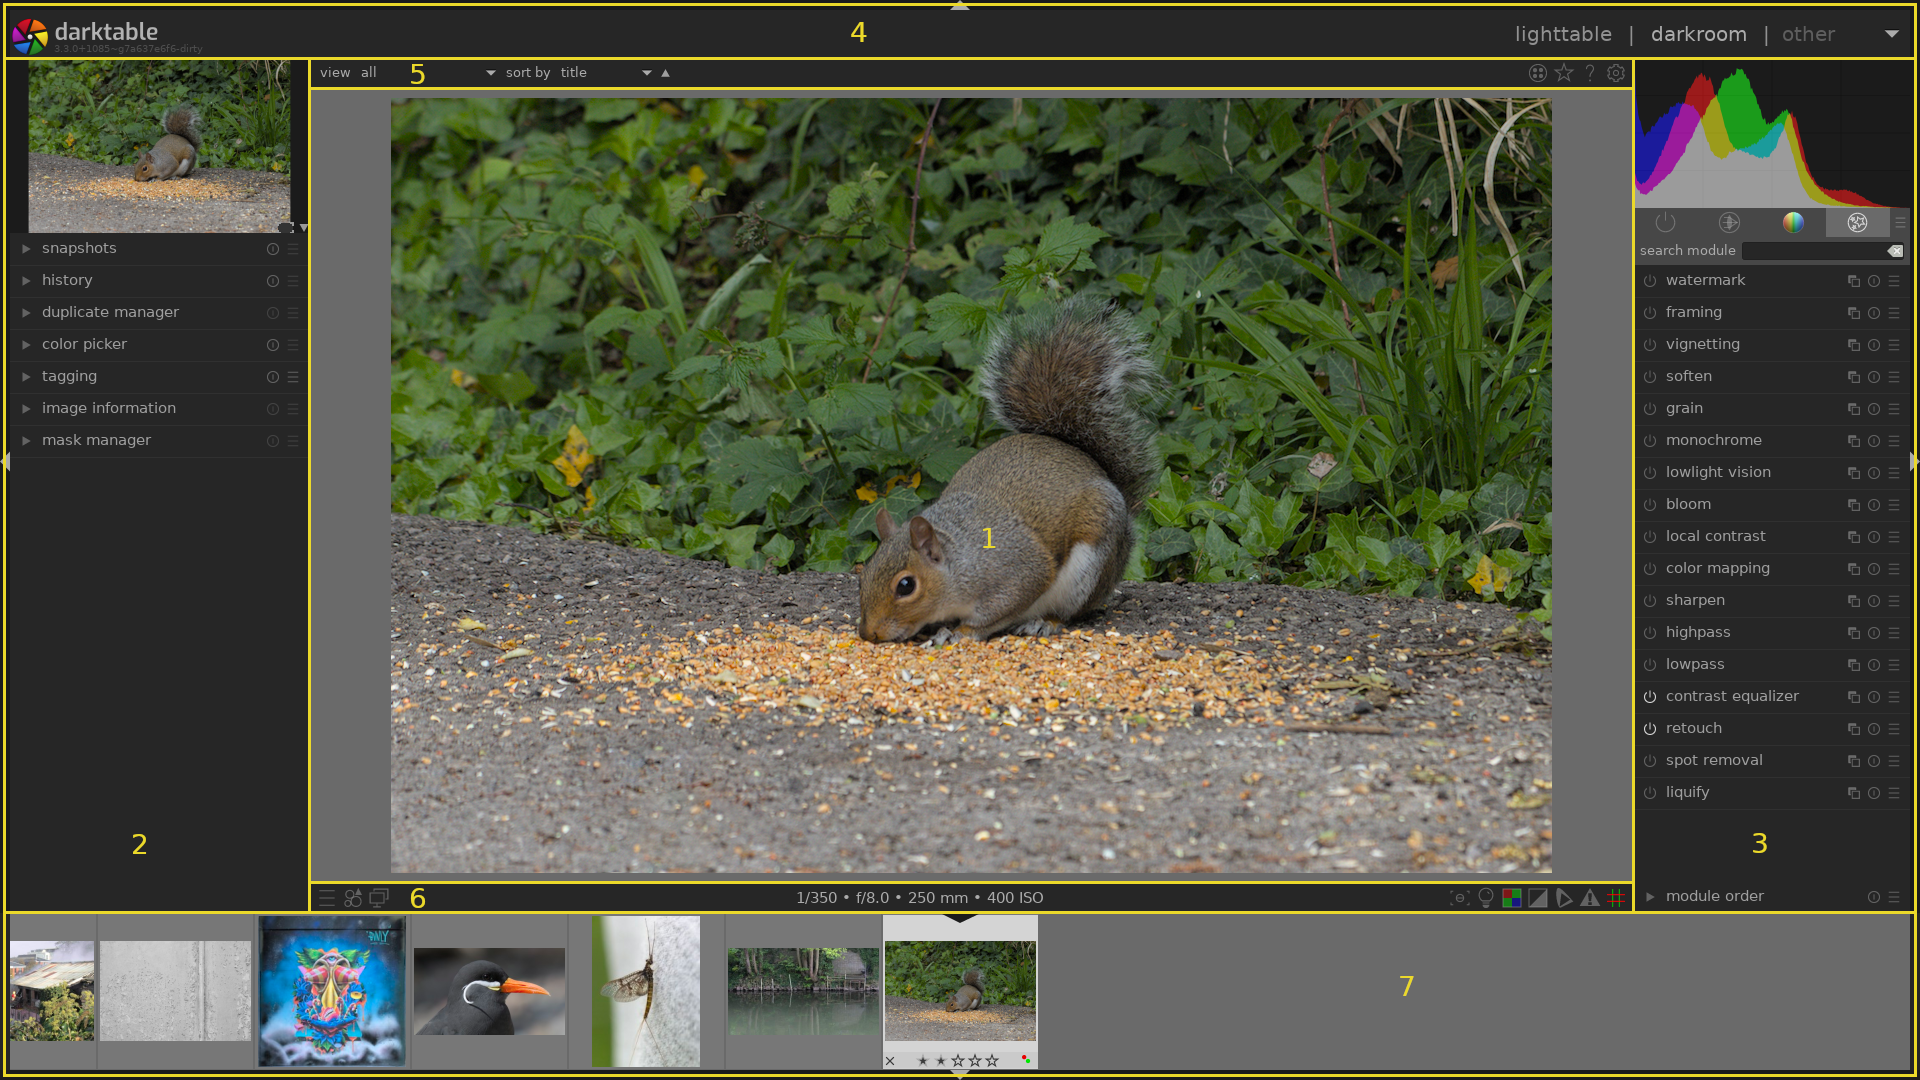
The layout of all darktable views is similar and consists of a center area with panels at the edges:
-
center area : Contains information and functionality specific to the current view.
-
left panel : Contains modules primarily used to provide information.
-
right panel : Contains modules primarily used for image processing.
-
top banner : Contains information about the current darktable version and allows you to switch between views. Also used by some modules to show additional hints and messages.
-
top panel : Provides access to global settings and shortcuts
-
bottom panel : Provides access to view-specific settings and shortcuts.
-
filmstrip/timeline panel : An optional panel that can be enabled at the bottom of the screen to display a timeline (in the lighttable view) or a filmstrip (in other views) of images in the current collection.
🔗panel size and visibility
The left, right and filmstrip/timeline panels can be resized by dragging their inner borders.
Each of the panels can be expanded or collapsed by pressing the triangle located at the outside edge of the panels. Panel visibility can also be adjusted using keyboard shortcuts, as follows:
TAB             Temporarily expand the centre view to fill the whole window.
                Press again to return to the previous view.
F11             Toggle fullscreen mode
Shift+Ctrl+t    Toggle the top panel (between the image and the top banner)
Shift+Ctrl+b    Toggle the bottom panel (between the image and the filmstrip/timeline, if shown)
Shift+Ctrl+l    Toggle the left panel
Shift+Ctrl+r    Toggle the right panel
Ctrl+f          Toggle the filmstrip/timeline
Ctrl+h          Toggle the top banner
b               Toggle all borders and panel-collapse controls
Note: The size and visibility of the panels are stored independently for each view.